-
The Return of Demon Winner: Normally I never post links to my blog in the Do Not Miss section, but this time is different. All your help is needed to bring back Demon Winner to live! So help me spread the word and let's make it the best GD database ever!
-
Naegannwg, Tândyndraig of Gwaelod: Under this atrocity of a name, we can find this wonderful miniature sculpted by Roberto Chaudon for Mierce Miniatures (old Maelstrom Games range of miniatures).
-
Getting the most out of your hobby: Interesting article by The Pirate Viking regarding how people spend their time in the miniature wargaming hobby world.
- Karaikal on painting desk lights: David Rodríguez (Karaikal) is back in business and shares with us all he knows about lamps. In Spanish I'm afraid, but just this once, as he is going to write bilingually from now on.
- Triscaidecafobia-gangster by Poisonauta: Always make sure you check this blog because Leo has an awesome ability for sculpting miniatures.
- Derkin by Pedro Fernández: Another awesome miniature by Pedro Fernández in Rafa Coll's Blog. He might be the most productive sculptor in the miniature world!
- Some WIPs by Romain: Stepping into Romain's blog is like opening the window to a world of fresh sculpting every day.
- Aztec Bust by Roberto Chaudon: Another miniature by Roberto Chaudon in the Do Not Miss of this month, in this case, a very interesting bust of an aztec.

Friday, November 30, 2012
Do Not Miss: November 2012
This is the most interesting stuff seen in November 2012:
Tuesday, November 20, 2012
Demon Winner resurrects
Good news for all Golden Demon lovers!

If you've been a Golden Demon competitor for quite some time you must already know the page Demon Winner.
Sadly, this wonderful initiative from some french friends was abandoned not long ago and there have been no updates on Golden Demon winners in all of 2012. My friend Jaime de Garnica, a spanish painter, was a very keen collaborator of this site but he is not able to contribute as he was doing any more.
Here's where the good news come! I will take over Jaime's place and will take care of updating the site to the full extent of my possibilities. Let's make Demon Winner the ultimate database for all Golden Demon lovers!
But I need your help guys! I am one man, with just two hands. I can't do it all. So I need you! How can you contribute to the site?
Help me Obi Wan Kenobi, you are my only hope.
If you've been a Golden Demon competitor for quite some time you must already know the page Demon Winner.
Sadly, this wonderful initiative from some french friends was abandoned not long ago and there have been no updates on Golden Demon winners in all of 2012. My friend Jaime de Garnica, a spanish painter, was a very keen collaborator of this site but he is not able to contribute as he was doing any more.
Here's where the good news come! I will take over Jaime's place and will take care of updating the site to the full extent of my possibilities. Let's make Demon Winner the ultimate database for all Golden Demon lovers!
But I need your help guys! I am one man, with just two hands. I can't do it all. So I need you! How can you contribute to the site?
- If you are a Golden Demon winner yourself, please enter the site, register, and update all of your trophies.
- If you are not a GD winner, or you are but you want to contribute further, please send me information that's missing on the site.
- Help by sharing this message all around! SPREAD THE WORD!!!
Friday, November 16, 2012
WIP: Swordmasters of Hoeth Part 4
Previously on... WIP: Swordmasters of Hoeth
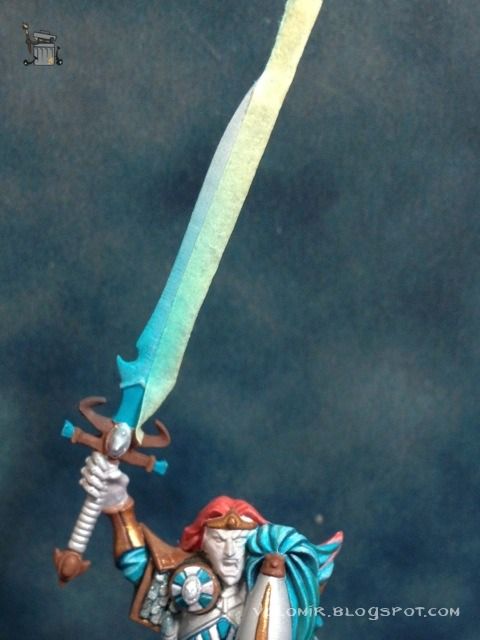
As I said, I will follow the same tecnique I used to paint the metallic parts in the High Elves Seaguard. The idea behind the process is exactly the same so I won't explain the reasons and conclusions of it. If you want more information about it, make sure you check out the Seaguard process. Here are some of the elves ready to be painted. In each of the elves, I have masked one of the blades on both sides of the sword.
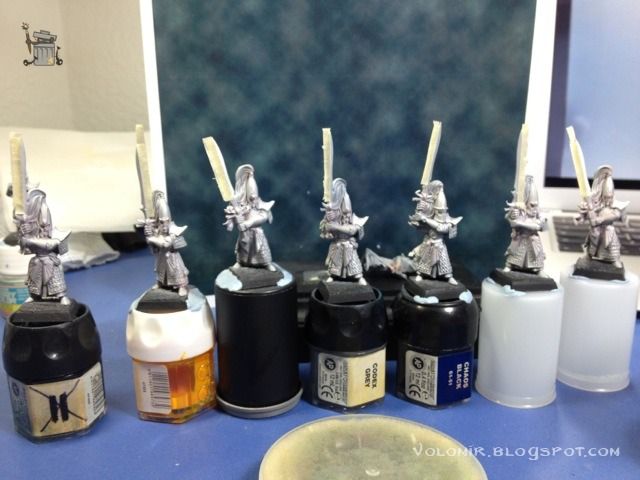
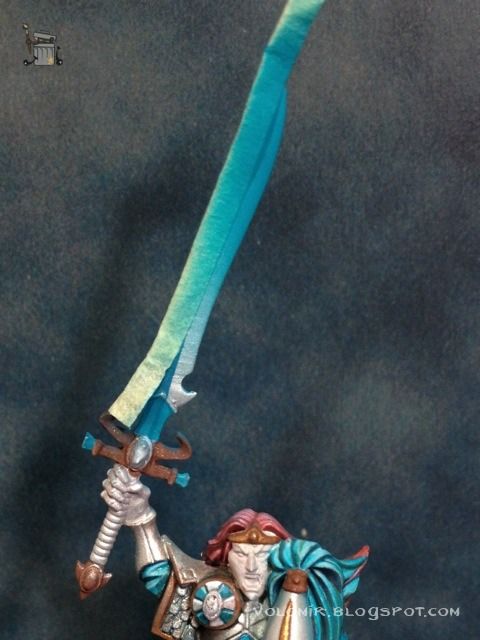
Here is how I would apply the paint on the sword, gradually, with airbrush, applying thin layers of semitransparent paint. Remember that the colour in the airbrush is only changed after the whole batch of elves has had that colour applied, on both sides of the sword.
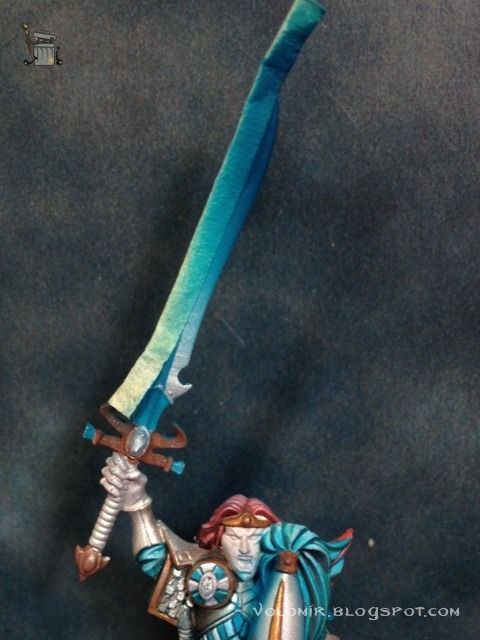
The first colour applied is turquoise blue, right out of the paint pot.
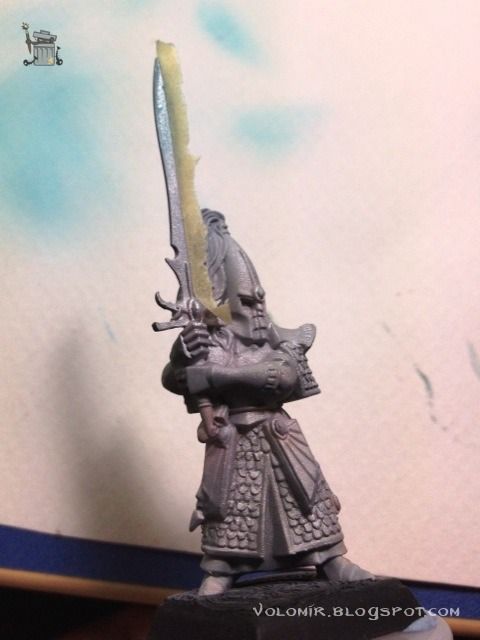
First shading is done with the same turquoise, mixed with some blue ink.
Further shading is done adding more blue ink as well as green ink.
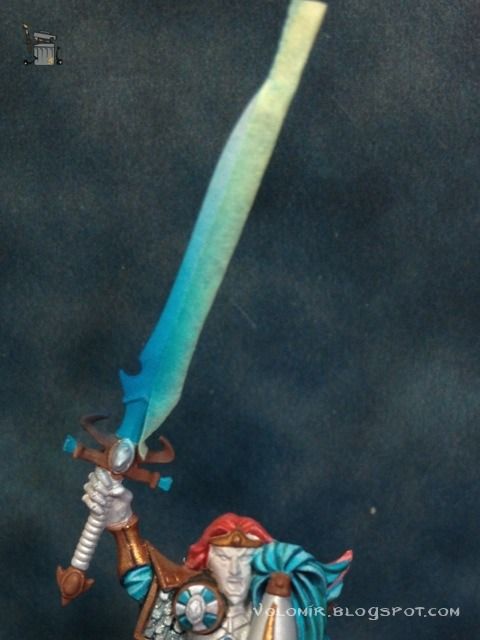
Final shadowing is done with just inks, and adding a little bit of black.
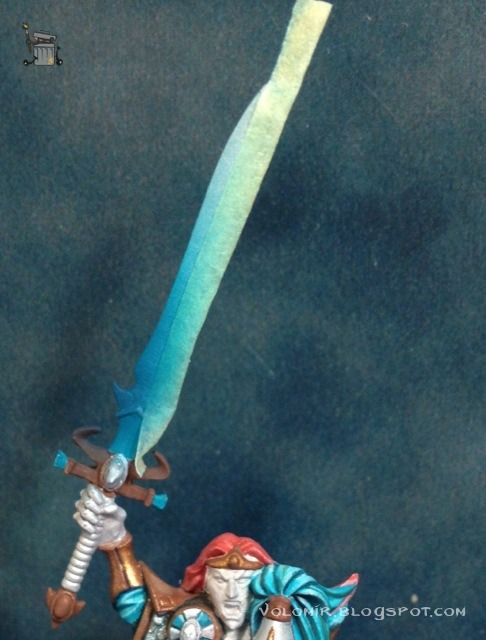
Now it's time to do the same on the other blade, so I mask the blades I have just painted.
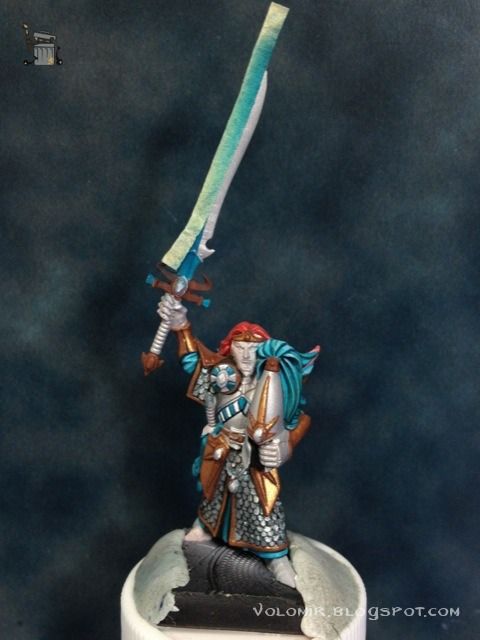
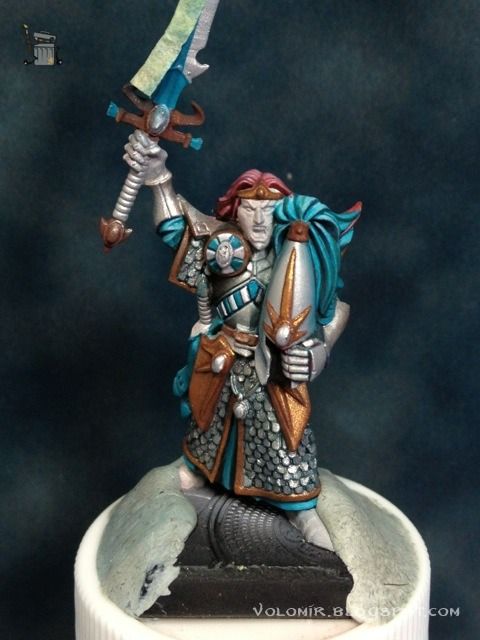
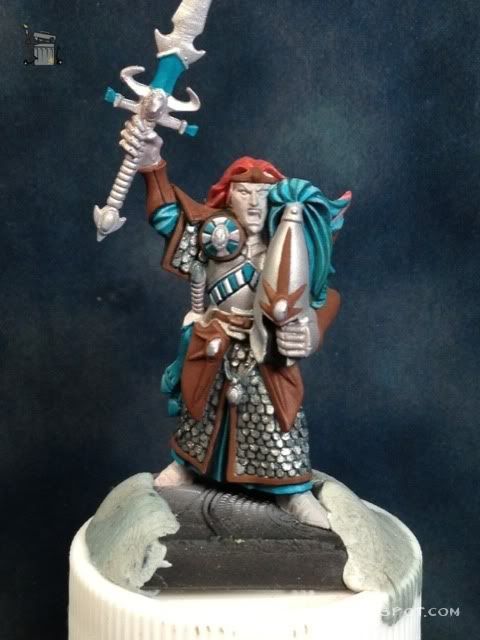
Before I continue with the sword painting, I get a sudden rush of motivation to continue painting the captain, and I need it completed before I move on to the rest. Always follow your muse!
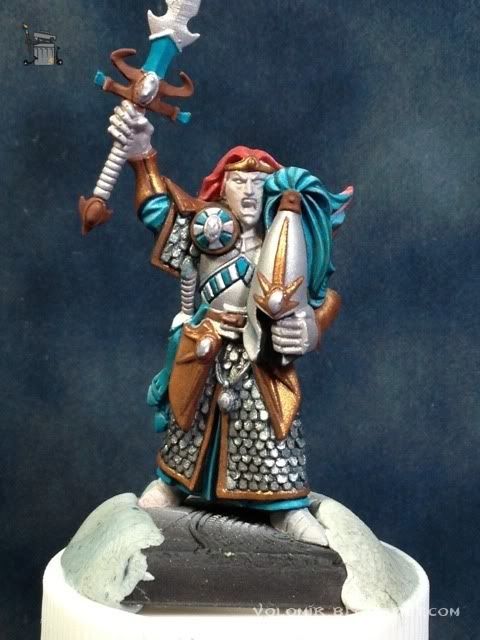
So what I do is change the bracelets and the right shoulder pad back to silver. I think it works much better in greyish metals than in gold. It's much more coherent with the general scheme, and also with the Seaguard.
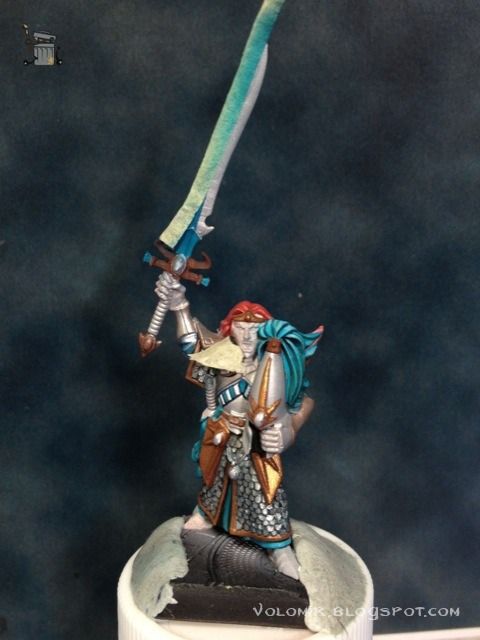
And now I change the red of the hair, which needed some serious work since long ago. I made the red much colder, adding some blue tones, and made some fine work on the hair to highligh and shadow, especially in the back part of the hair which unfortunately you cannot see in this photo.
Back to the metallic airbrush work. Same way as before, some turquoise to shade that polished silver.
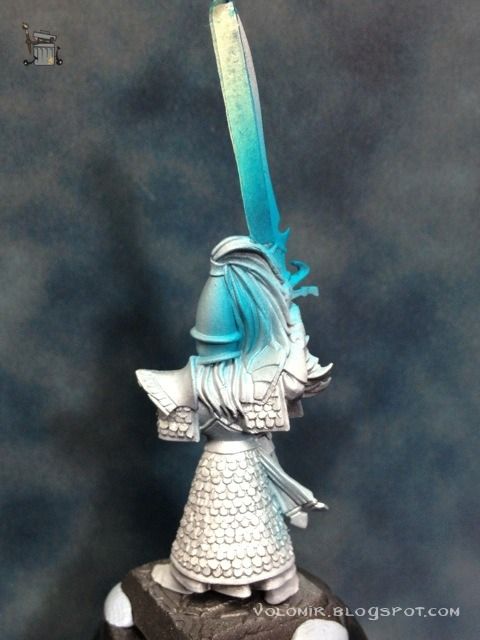
I won't be using the airbrush to shade metals after I finish with the sword metals, so I use this last batch of shade colours with airbrush to make some shading on some parts of the armour, and also paint the helmet manes. Regarding the armour, the key is to shadow those metallic elements which are closer to blueish parts of the miniature. In this case, all the miniatures are very similar so I just have to concentrate on the metals that are close to the blue manes of the helmets. You can see in this one how I shade the side of the helmet and the top part of the bracelet.
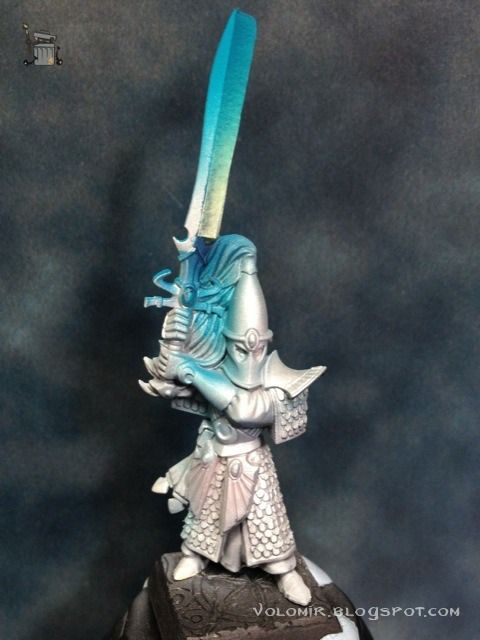
The same must be applied to the back part of the helmet. Though I must say, in this case I exceeded myself. I'll have to fix that with some airbrushing of silver metal.
Next shadows with blue inks, as well as green inks.
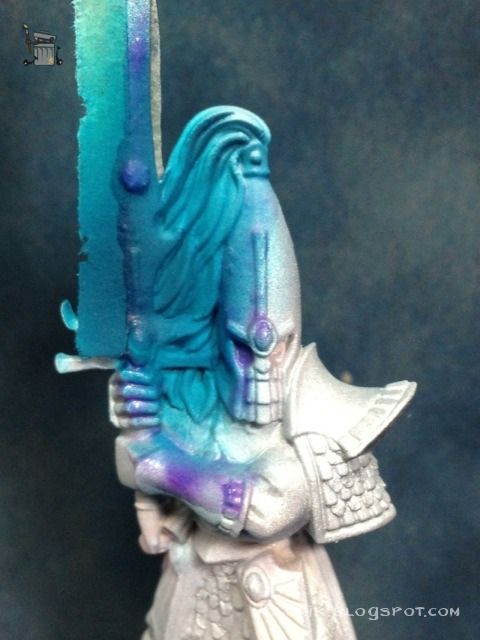
Basic work on helmet manes is easily done with airbrush. I need to mask the elements that surround them or else I will destroy for sure the work already done in swords and armour. Here's where all that liquid mask (Maskol) comes in handy. First, the base with turquoise blue.
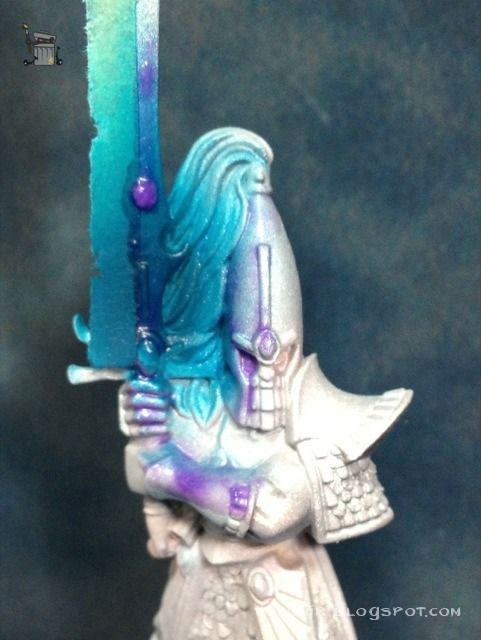
Then shadows, adding blue and green inks to the mix. Check how I didn't paint the top part of the mane to leave it white. That's my maximum light and I want to leave it white for now as it will give me a very nice contrast when the unit is displayed altogether. Also notice how half the helmet has turned blue. No problem, the mask will do its job perfectly.
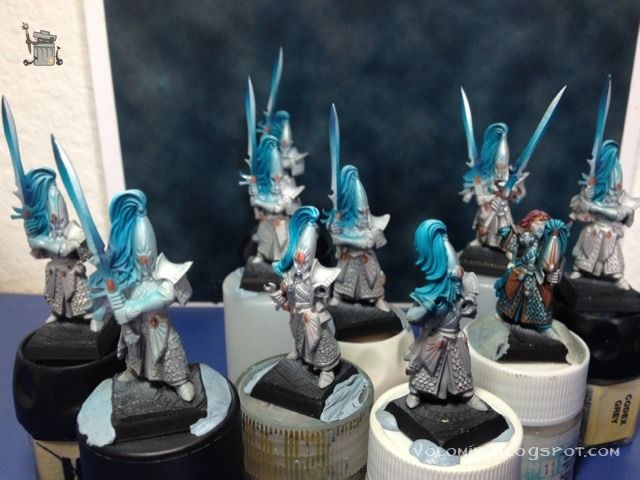
So once this serial work is finished, I take off all masking. here's how the whole unit looks like.
I believe serial airbrush work is finished. I will start using brush from now on.
Continue to WIP: Swordmasters of Hoeth Part 5
As I said, I will follow the same tecnique I used to paint the metallic parts in the High Elves Seaguard. The idea behind the process is exactly the same so I won't explain the reasons and conclusions of it. If you want more information about it, make sure you check out the Seaguard process. Here are some of the elves ready to be painted. In each of the elves, I have masked one of the blades on both sides of the sword.
Here is how I would apply the paint on the sword, gradually, with airbrush, applying thin layers of semitransparent paint. Remember that the colour in the airbrush is only changed after the whole batch of elves has had that colour applied, on both sides of the sword.
The first colour applied is turquoise blue, right out of the paint pot.
First shading is done with the same turquoise, mixed with some blue ink.
Further shading is done adding more blue ink as well as green ink.
Final shadowing is done with just inks, and adding a little bit of black.
Now it's time to do the same on the other blade, so I mask the blades I have just painted.
Before I continue with the sword painting, I get a sudden rush of motivation to continue painting the captain, and I need it completed before I move on to the rest. Always follow your muse!
So what I do is change the bracelets and the right shoulder pad back to silver. I think it works much better in greyish metals than in gold. It's much more coherent with the general scheme, and also with the Seaguard.
And now I change the red of the hair, which needed some serious work since long ago. I made the red much colder, adding some blue tones, and made some fine work on the hair to highligh and shadow, especially in the back part of the hair which unfortunately you cannot see in this photo.
Back to the metallic airbrush work. Same way as before, some turquoise to shade that polished silver.
I won't be using the airbrush to shade metals after I finish with the sword metals, so I use this last batch of shade colours with airbrush to make some shading on some parts of the armour, and also paint the helmet manes. Regarding the armour, the key is to shadow those metallic elements which are closer to blueish parts of the miniature. In this case, all the miniatures are very similar so I just have to concentrate on the metals that are close to the blue manes of the helmets. You can see in this one how I shade the side of the helmet and the top part of the bracelet.
The same must be applied to the back part of the helmet. Though I must say, in this case I exceeded myself. I'll have to fix that with some airbrushing of silver metal.
Next shadows with blue inks, as well as green inks.
Basic work on helmet manes is easily done with airbrush. I need to mask the elements that surround them or else I will destroy for sure the work already done in swords and armour. Here's where all that liquid mask (Maskol) comes in handy. First, the base with turquoise blue.
Then shadows, adding blue and green inks to the mix. Check how I didn't paint the top part of the mane to leave it white. That's my maximum light and I want to leave it white for now as it will give me a very nice contrast when the unit is displayed altogether. Also notice how half the helmet has turned blue. No problem, the mask will do its job perfectly.
So once this serial work is finished, I take off all masking. here's how the whole unit looks like.
I believe serial airbrush work is finished. I will start using brush from now on.
Continue to WIP: Swordmasters of Hoeth Part 5
Thursday, November 8, 2012
Painting course in Madrid 1-2 December 2012 (in Spanish)
This entry is to announce another of my painting courses in Madrid. I usually only announce them on the spanish part of the blog, but I figured there might be people speaking spanish which only read the english part of the blog, so I decided to copy the announcement here too! Just in case anyone interested happens to be able to be in Madrid that weekend. :)
Será por lo tanto un curso intensivo de un solo fin de semana ya que hay gente que viene de fuera. Esta es la información específica sobre el curso:
Lo primero, el precio del curso es de 95 euros. Vamos a pintar cada uno la figura que queramos, que previamente tendrá que ser aprobada por mí para asegurar que cumple una serie de requisitos mínimos de cara al aprovechamiento del curso. Por lo tanto, para el curso hay que llevarse una figura (que a ser posible preparamemos previamente al curso para ganar tiempo), pinceles y siempre que sea posible, un flexo o similar para luz. El resto del material lo pongo yo.
El curso se dará en mi casa. Ahora vivo en el centro así que es fantástico porque está muy cerca de Atocha, en Madrid. Hay bastante espacio y estaremos muy cómodos y tranquilos. Además tengo todos los bártulos a mano y no tendré que moverlos, podremos usar el aerógrafo sin complicaciones. El grupo no será muy grande, normalmente los cursos son de entre 6 y 8 personas, para el mejor aprovechamiento del espacio y del tiempo que puedo dedicar a cada uno.
Éste será el temario del curso:
El curso serán unas 8 horas cada día, quedamos por la mañana, paramos para comer y luego seguimos por la tarde hasta que nos cansemos. El que sea 2 días separados lo hace menos cansado y más productivo, ya que veréis que son muchas cosas las que vamos a ver de forma bastante intensiva. Además así podéis practicar lo que aprendáis el primer día y luego preguntar dudas que os hayan surgido en el proceso el segundo día.
En la primera sesión abarcaremos los aspectos básicos y nos pondremos a pintar la figura que hayamos traido. El tiempo entre los dos días debería ser empleado para terminar la figura en casa a modo de deberes (o avanzar lo que se pueda) para luego revisar los resultados y comentar fallos y dudas. El segundo día daremos el resto del temario y terminaremos de pintar la figura completamente.
Puesto que el temario es amplio (mucho) y por experiencia sé que no da tiempo a verlo todo bien, os pasaré unos apuntes introductorios antes del curso para que los leáis antes del curso y tengamos ya algo avanzado. Así aprovecharemos el tiempo practicando lo máximo posible, que es donde realmente váis a sacar partido. Veremos muchas cosas y muy por encima, pero es el temario ideal para pasar de no tener ni idea de pintura a ser un pintor de concursos.
Y eso es todo. Ya os digo que aún queda algún hueco así que si estáis interesados, ¡mandadme un correo y lo hablamos!
- Clase 1: Sábado 1 Diciembre
- Clase 2: Domingo 2 Diciembre
Será por lo tanto un curso intensivo de un solo fin de semana ya que hay gente que viene de fuera. Esta es la información específica sobre el curso:
Lo primero, el precio del curso es de 95 euros. Vamos a pintar cada uno la figura que queramos, que previamente tendrá que ser aprobada por mí para asegurar que cumple una serie de requisitos mínimos de cara al aprovechamiento del curso. Por lo tanto, para el curso hay que llevarse una figura (que a ser posible preparamemos previamente al curso para ganar tiempo), pinceles y siempre que sea posible, un flexo o similar para luz. El resto del material lo pongo yo.
El curso se dará en mi casa. Ahora vivo en el centro así que es fantástico porque está muy cerca de Atocha, en Madrid. Hay bastante espacio y estaremos muy cómodos y tranquilos. Además tengo todos los bártulos a mano y no tendré que moverlos, podremos usar el aerógrafo sin complicaciones. El grupo no será muy grande, normalmente los cursos son de entre 6 y 8 personas, para el mejor aprovechamiento del espacio y del tiempo que puedo dedicar a cada uno.
Éste será el temario del curso:
- Preparación de una figura (trabajo previo al curso recomendado, guiado si es necesario)
- Teoría básica del color (ambientación, armonía)
- Iluminación de una figura (tipos de iluminación, luz, sombra, contraste, luces máximas)
- Técnicas de pintura (pinceladas, veladuras, tonos, aguadas, tintas, perfilados...)
- Pintado de caras
- Pintado de Metales (Metal real y NMM: Non Metallic Metal)
- Pintado de Efectos (texturas, cueros, desconchones, sangre...)
- Freehands
- Uso básico del Aerógrafo
- Trucos
El curso serán unas 8 horas cada día, quedamos por la mañana, paramos para comer y luego seguimos por la tarde hasta que nos cansemos. El que sea 2 días separados lo hace menos cansado y más productivo, ya que veréis que son muchas cosas las que vamos a ver de forma bastante intensiva. Además así podéis practicar lo que aprendáis el primer día y luego preguntar dudas que os hayan surgido en el proceso el segundo día.
En la primera sesión abarcaremos los aspectos básicos y nos pondremos a pintar la figura que hayamos traido. El tiempo entre los dos días debería ser empleado para terminar la figura en casa a modo de deberes (o avanzar lo que se pueda) para luego revisar los resultados y comentar fallos y dudas. El segundo día daremos el resto del temario y terminaremos de pintar la figura completamente.
Puesto que el temario es amplio (mucho) y por experiencia sé que no da tiempo a verlo todo bien, os pasaré unos apuntes introductorios antes del curso para que los leáis antes del curso y tengamos ya algo avanzado. Así aprovecharemos el tiempo practicando lo máximo posible, que es donde realmente váis a sacar partido. Veremos muchas cosas y muy por encima, pero es el temario ideal para pasar de no tener ni idea de pintura a ser un pintor de concursos.
Y eso es todo. Ya os digo que aún queda algún hueco así que si estáis interesados, ¡mandadme un correo y lo hablamos!
Tuesday, November 6, 2012
WIP: Swordmasters of Hoeth Part 3
Previously on... WIP: Swordmasters of Hoeth
Let's take a break from the Dragon (this doesn't mean I'm going to put it aside, just take some time to paint other easier and less mind consuming stuff while I get the painting muse back). I'm staying with High Elves for the moment, back to the Swordmasters of Hoeth! It's been some time since the last update so you might want to check the previous chapter of the process to see where we left off.
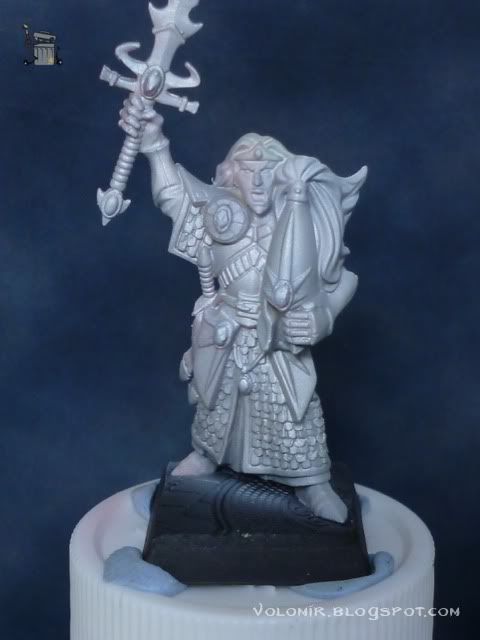
The painting process of the whole unit should start by completely painting one of the Elves. This is to get the general idea of how the colour scheme works before putting effort on painting 10 guys, in case there's changes that need to be made. This will certainly save us a lot of time! Even so, there's a lot of work already done in the High Elves Sea Guard unit because the colour scheme will be very similar (they will be in the same army) and there's processes that I will reuse. Therefore, I have planned the painting process beforehand. Let's break down the steps:
Looks good and straightforward! :)
So first of all, airbrushing gems. I did this before, exactly the same way, in the High Elves Sea Guard unit, but I will explain it once again for those who didn't follow the other process. Bear in mind that every step I mention will be done on every gem, on every elf.
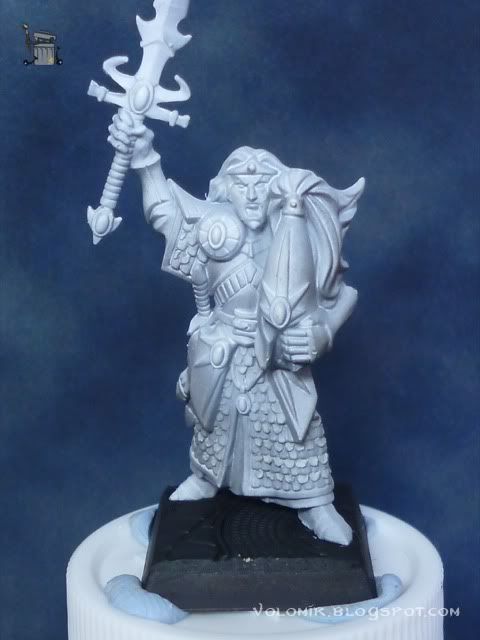
Airbush of a very light yellow over the whole gem.
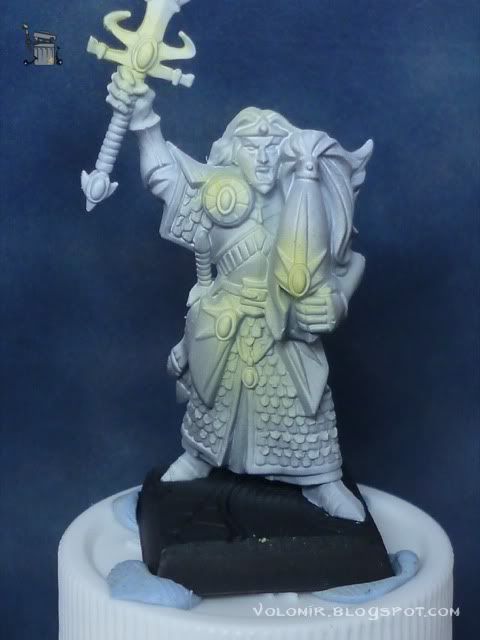
Airbush of fiery orange over the gem, trying to leave a bit of light yellow on the edge.
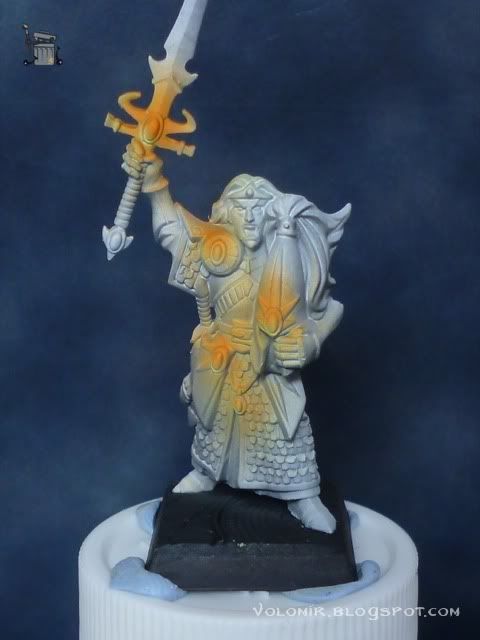
Airbush of blood red yellow over the gem, again leaving a bit of the previous steps to be seen.
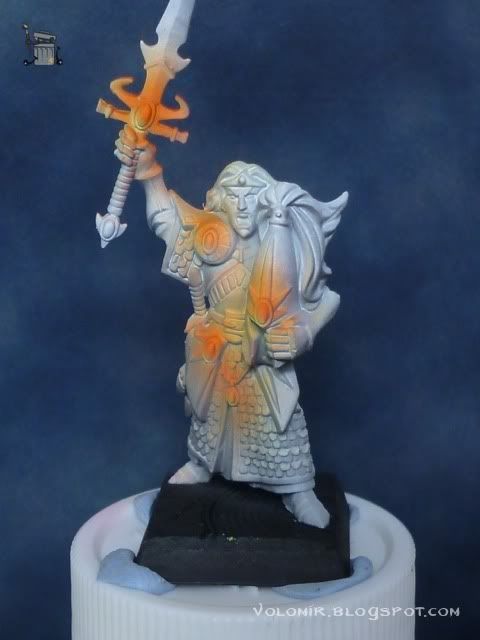
Final airbush of chaos black over the upper edge of the gem.
As you can see the result isn't perfect, but it's more than ok for a first approximation. You have to consider that we will use airbrush later, and the appearance of the gem will change with the rest of the elements in place. But with this serial work we will accelerate a lot the painting of gems. So let's cover the gems with liquid mask.
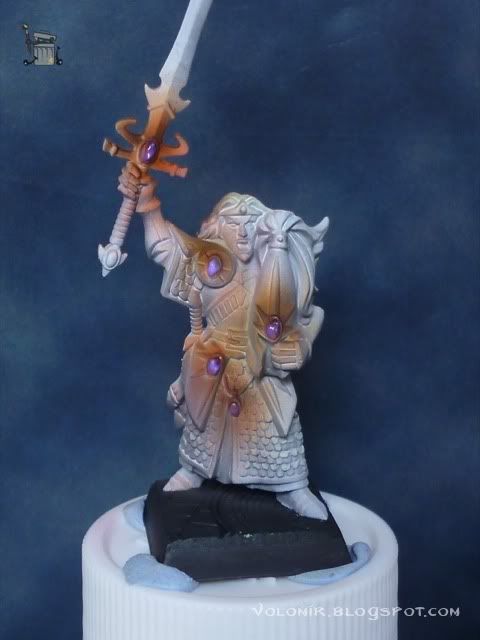
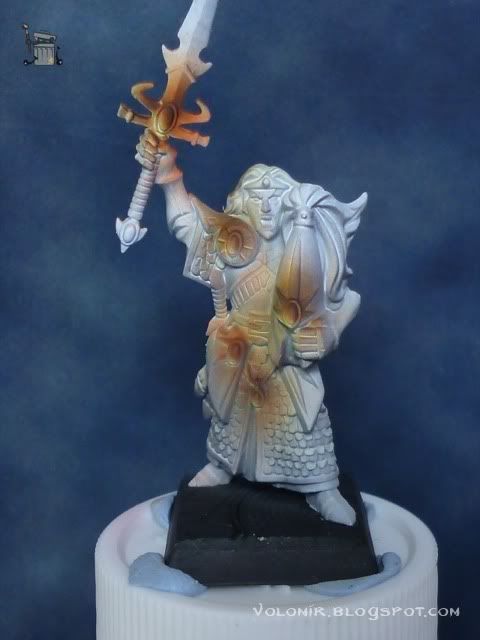
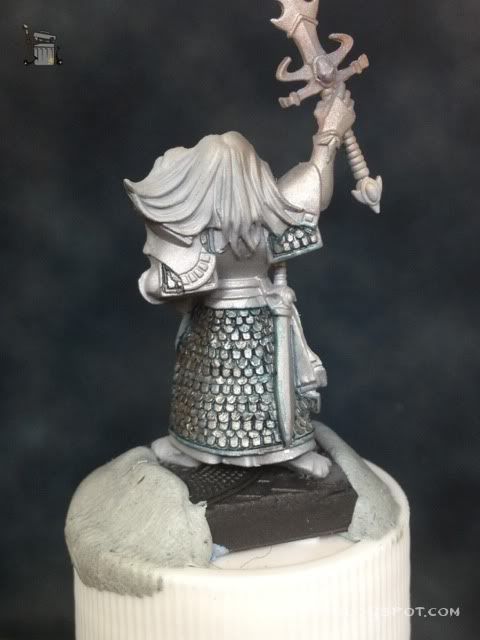
Now let's get back the priming base colour on those areas that were airbrushed with other colours, and then I will airbrush a base metal (Mithril Silver in this case, as the metals in the elves are very bright).
As I said, all this work has been done on all the elves, following a serial process. I'm going to switch back to painting just one elf, to test colour scheme, as I said. Let's work on the armour scales, washing them with some blue and green inks, very dilluted.
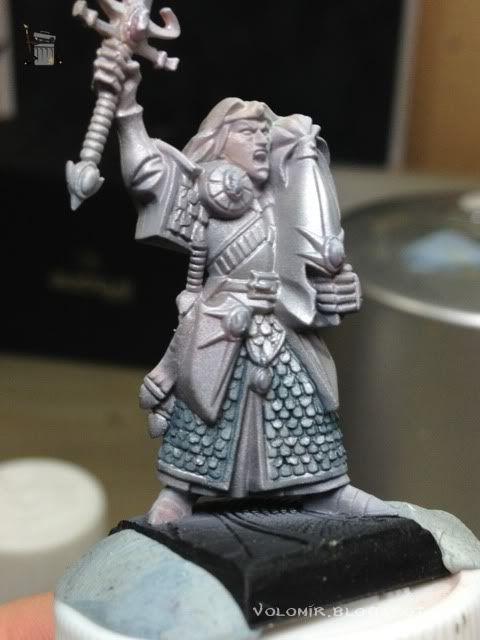
This process has to be done carefully, inks are very strong so they paint a lot. When painting it's usually better (in terms of time) to be left short than to have to go back!
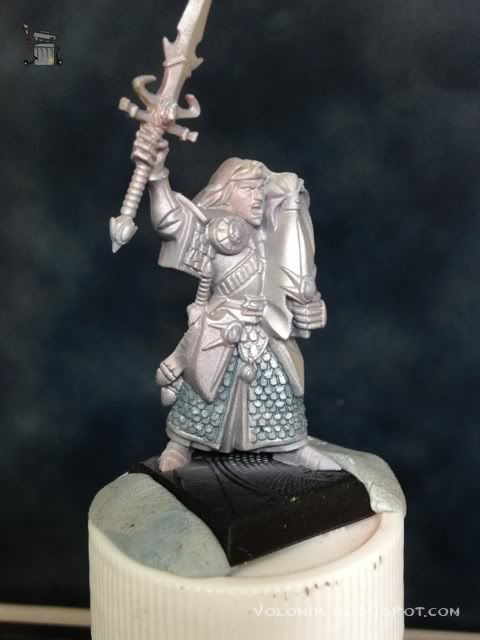
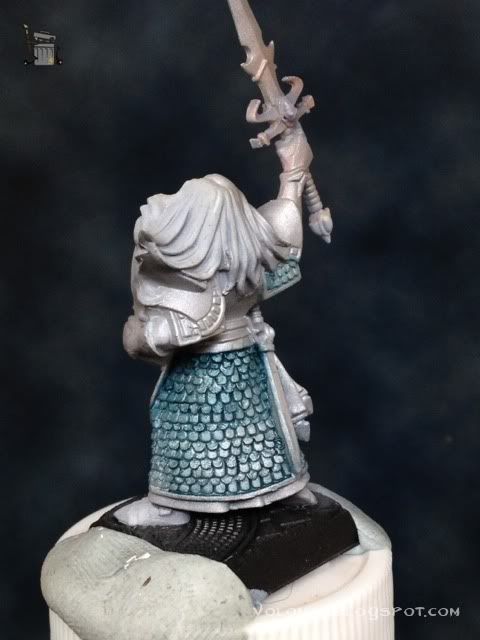
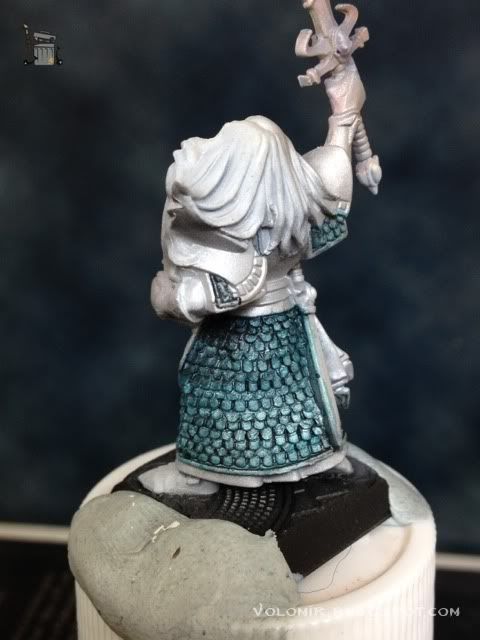
The scales are now very dark, let's get back the metal by carefully painting the scales with Mithril Silver, now respecting the general light and shadow scheme on the tunic.
Let's leave the scales there and give some colour to the rest to get a the general idea. Here's some basing of gold metallics (matt brown before introducing metallic pigments), turquoises for hair and inner tunics, and red for the elf's hair.
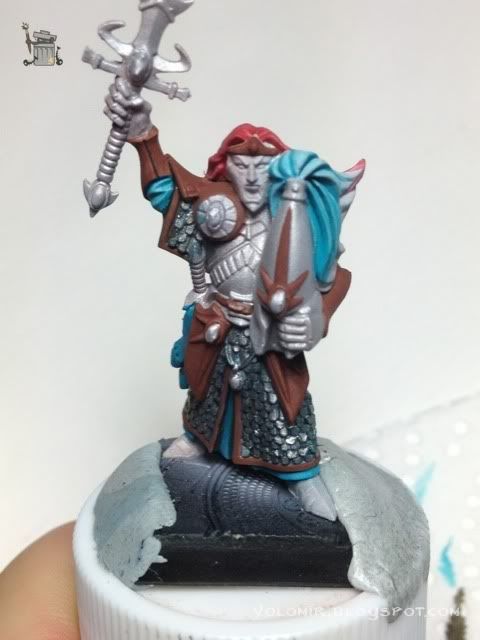
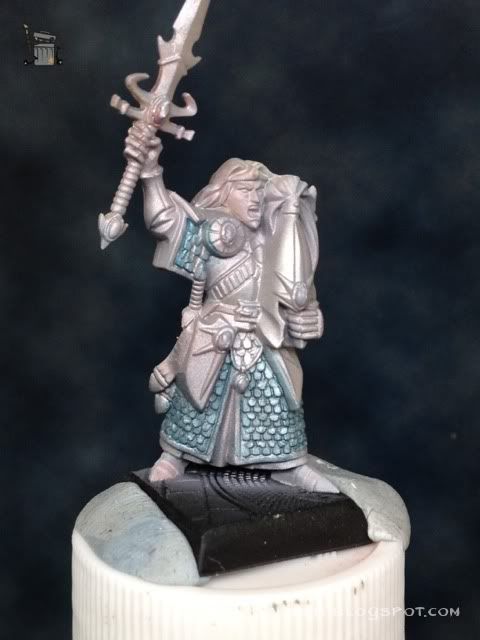
Continuing on some detail painting, see how the white and blue squares make a big difference.
And now introducing the metallic gold. The scheme looks good so far. The only thing that is not well tuned is the red of the hair. It has to be much darker and colder. Living proof that I did very well experimenting with a single elf before painting all serially!
Even so, I see that to make progress on the elf I need to start shading metals of armour and swords, and that is really much better done serially. As it won't affect my choice of scheme because I already know it works, I will switch back to serial painting from now on.
Continue to WIP: Swordmasters of Hoeth Part 4
Let's take a break from the Dragon (this doesn't mean I'm going to put it aside, just take some time to paint other easier and less mind consuming stuff while I get the painting muse back). I'm staying with High Elves for the moment, back to the Swordmasters of Hoeth! It's been some time since the last update so you might want to check the previous chapter of the process to see where we left off.
The painting process of the whole unit should start by completely painting one of the Elves. This is to get the general idea of how the colour scheme works before putting effort on painting 10 guys, in case there's changes that need to be made. This will certainly save us a lot of time! Even so, there's a lot of work already done in the High Elves Sea Guard unit because the colour scheme will be very similar (they will be in the same army) and there's processes that I will reuse. Therefore, I have planned the painting process beforehand. Let's break down the steps:
- Gems (airbrush)
- Metals (airbrush)
- Hair (airbrush)
- Brushwork
- Outlining
- Banner
- Bases
Looks good and straightforward! :)
So first of all, airbrushing gems. I did this before, exactly the same way, in the High Elves Sea Guard unit, but I will explain it once again for those who didn't follow the other process. Bear in mind that every step I mention will be done on every gem, on every elf.
Airbush of a very light yellow over the whole gem.
Airbush of fiery orange over the gem, trying to leave a bit of light yellow on the edge.
Airbush of blood red yellow over the gem, again leaving a bit of the previous steps to be seen.
Final airbush of chaos black over the upper edge of the gem.
As you can see the result isn't perfect, but it's more than ok for a first approximation. You have to consider that we will use airbrush later, and the appearance of the gem will change with the rest of the elements in place. But with this serial work we will accelerate a lot the painting of gems. So let's cover the gems with liquid mask.
Now let's get back the priming base colour on those areas that were airbrushed with other colours, and then I will airbrush a base metal (Mithril Silver in this case, as the metals in the elves are very bright).
As I said, all this work has been done on all the elves, following a serial process. I'm going to switch back to painting just one elf, to test colour scheme, as I said. Let's work on the armour scales, washing them with some blue and green inks, very dilluted.
This process has to be done carefully, inks are very strong so they paint a lot. When painting it's usually better (in terms of time) to be left short than to have to go back!
The scales are now very dark, let's get back the metal by carefully painting the scales with Mithril Silver, now respecting the general light and shadow scheme on the tunic.
Let's leave the scales there and give some colour to the rest to get a the general idea. Here's some basing of gold metallics (matt brown before introducing metallic pigments), turquoises for hair and inner tunics, and red for the elf's hair.
Continuing on some detail painting, see how the white and blue squares make a big difference.
And now introducing the metallic gold. The scheme looks good so far. The only thing that is not well tuned is the red of the hair. It has to be much darker and colder. Living proof that I did very well experimenting with a single elf before painting all serially!
Even so, I see that to make progress on the elf I need to start shading metals of armour and swords, and that is really much better done serially. As it won't affect my choice of scheme because I already know it works, I will switch back to serial painting from now on.
Continue to WIP: Swordmasters of Hoeth Part 4
Subscribe to:
Posts (Atom)