
In this article I am going to describe the process I follow when I make my banner designs in the computer before I actually paint them on the final flag. The program I will be using is not Photoshop, as you may all think. I will be using GIMP, a freeware graphic editor very similar to Photoshop which you may download for free. Of course, this is not a GIMP tutorial. I will suppose you have at least minimum concepts about graphic editing (don’t worry, just being a bit familiar with some of the tools provided by this type of programs will be enough).
First of all, and maybe the hardest part, is the idea. If you are able to draw your concept in a piece of paper, then you are past this point. In fact, you may stop reading this article because you won’t need it. Here we will be designing banners made up from parts of other existing designs, which will be a lot easier and will compensate lacks of creativity. You don’t have to invent the wheel every time!
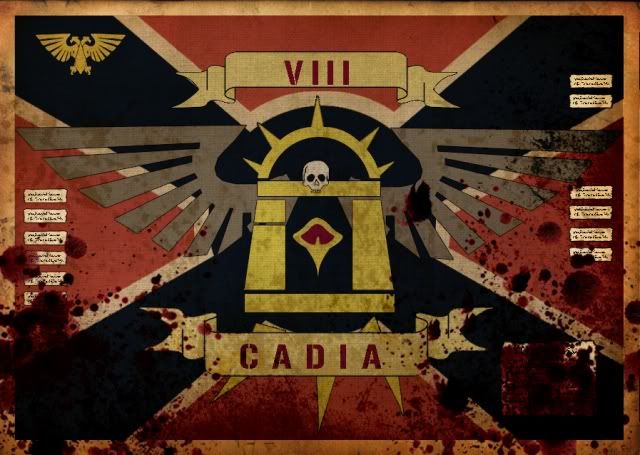
So, the first task is to look for a design which may fit us as background frame. In this case, I’m going to prepare a design for the Crimson Fists Space Marine chapter. I have already thought about colours and symbols: crimson red and dark blue for the colours, imperial Warhammer 40,000 imagery and a huge armoured fist symbol as iconography. Surfing through the web I find a lot of images, but ironically, the one I like the most is a Cadian Banner design, this one:
I liked the background design, with the dark blue cross over red, and a big circle in the middle which will be great to hold the big armoured fist. Now I look out for some pictures of armoured fists from Fist Space Marine chapters. I find this one from the Imperial Fists:

In fact, I remember this fist from before! It’s the same as the one I used for my Imperial Fists Standard Bearer. In that case, the design was done by a friend, he must have used it as I will be doing right now!
Alright then, I think we have enough material to start with. The Cadian Flag has the background and some interesting symbols: the imperial wings, the Cadian door, a little halo over it and some papyrus frames for inscriptions.
The next thing to do is separate all those elements into different archives, so we can then play with them as if we were doing some kind of collage. The method is quite simple. We will be using the selection tools to separate each part, then cut them and save them as new files. Here is a little explanation on how to use two of the tools (the two I find most useful). You have to decide which the best in each case is. For example, this is how we can use each one of them for the halo:
Magic Wand:
Magic wand selects areas based on a colour. You pick a point in the image and the program selects all the adjacent pixels which have the same colour, or at least a similar one, depending on the level of threshold you set. I see that the halo is made of a yellowish colour which separates it from the rest of the design. Therefore, I can use the "magic wand" tool to select it. I just have to adjust the threshold to a level which enables selection of just that colour, and not the colours which surround the halo. I adjust the zoom and try:
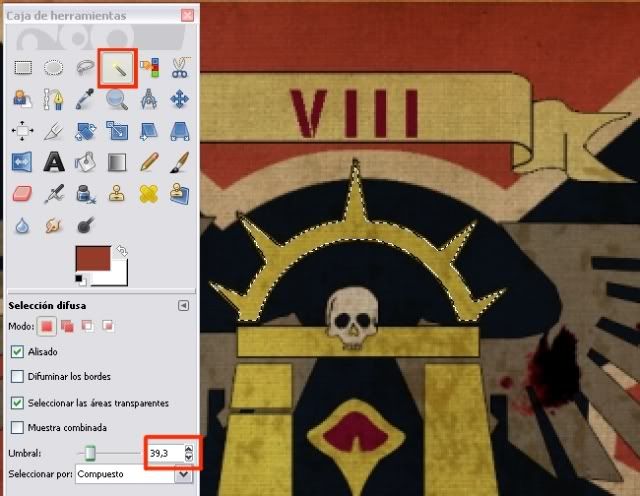
You can see in red the magic wand and the threshold value. With the magic wand I was able to select the halo’s inner yellow, but I couldn’t select the outer brown contour without selecting more colours out of the halo. I guess the magic wand is not going to be useful this time!
Free Selection Tool
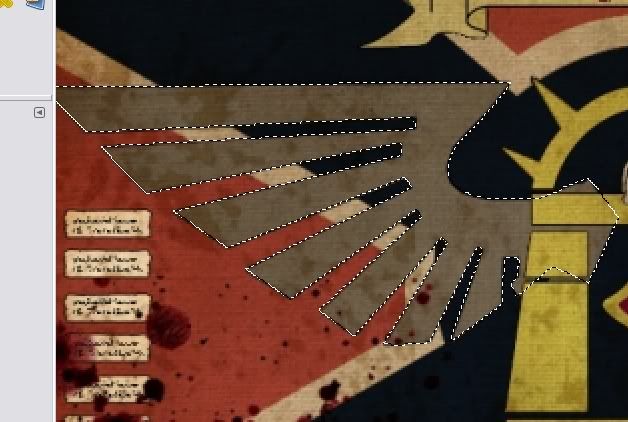
This tool is useful to select areas by literally drawing them. Each click you make is a vertex of a polygon which will form the final selection when you join the last two vertices. You will want to use big zoom so you can work as close as a pixel range you can. The closer the range, the smoother the selection will be. In fact, you can use some of the tools provided by GIMP to make the selection smoother, but I won’t be talking about that now. Let’s stick to the basics.
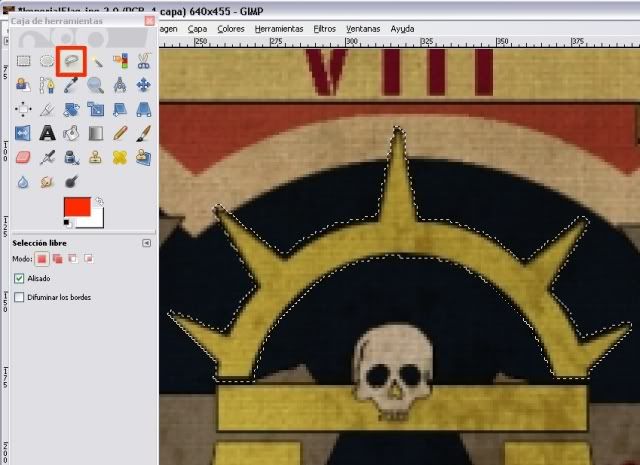
The red square points to the button of free selection tool. You see in the image that I managed to select the entire halo this time!
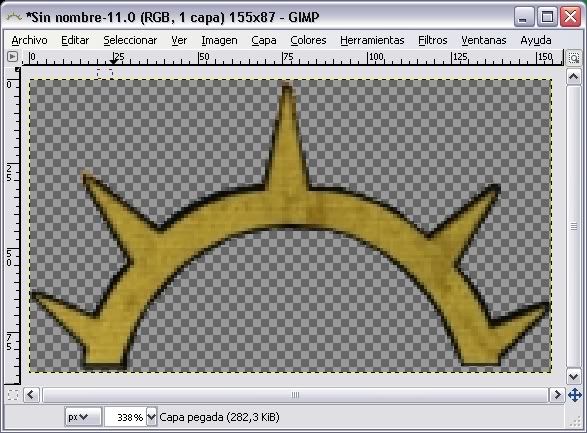
Now we have the area selected, simply cut and paste it as a new image.
That’s what we have to do for each of the parts we want to use as pieces of our banner collage.
There are some pieces in the design which have parts overlapping other pieces, and because of this they can’t be separated completely. Therefore, we have to finish them off. This is the case of the imperial eagle wings. Here’s what we have:
See? There’s some part of the Cadian Door over the right part of the wing. We have to complete this part by drawing a little bit, doing the selection inventing the part we cannot see, and then getting rid of the Cadian Door. I will be using the airbrush tool to do this. Do not deselect the wing yet, you can use drawing tools affecting only the parts of the image selected so you don’t ruin the rest of the picture!
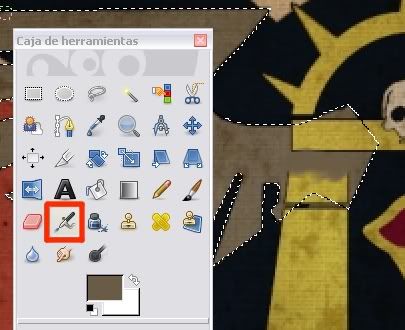
So, click on the airbrush tool. Ctrl+click on any brown you like from the rest of the wing, you will be picking the colour you’ll be using now. Then, airbrush over the Cadian Door (see the image above) to get rid of it. Finally, cut and paste it into a new image, and save it.
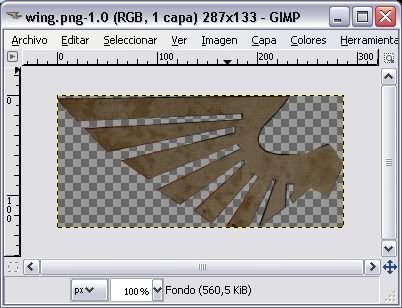
You’ll notice that with the airbrush you won’t be achieving the same texture as the one in the original design. That’s not a problem. You don’t need to be detailing so much right now, we just want to have a clear schema of the design. The final results will be what you can perform with a paintbrush, doesn’t really matter what you try to blend colours in a Photoshop design.
So, with this I’ve separated all the pieces I will be using in my design.
Now you have all the pieces in different files, is just a matter of imagination and creativity. Open the background with GIMP, drag and drop the pieces you want into the image, move them, resize them... whatever you want! A quick design I made in a couple of minutes:
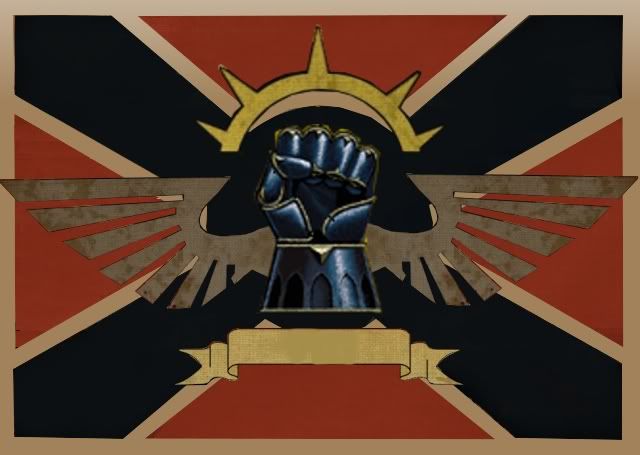
See? The potential is enormous, and you don’t have to know how to draw! Make your own library of pieces, and you’ll have a banner design maker machine. Enjoy!
1 comment:
Awesome tutorial. Can't wait to try it out!
Post a Comment