
Malus Darkblade
The modelling of Malus Darkblade is a typical case of what theoretically should not be done if we want to end up with a nice quality sculpture. My intention was to get the figure based on this concept, with the same pose:

Since it was going to be an entry for Golden Demon, my first limitation was that it would have to be made from commercial parts from GW. To do this, I bought the dark elf corsairs box that had just went out into the market. The first problem to achieve the strength of the picture was the proportions. Using Warhammer figures it’s impossible to get the look of the illustration provided, since GW figures tend to be leg short, with hands and head unusually large. Therefore, I would try to use bits as little as possible, and model the rest. This is the main problem, I ended nearly modelling from scratch while beginning the process as a conversion. This is a huge mistake, I should have built the whole mannequin from scratch.
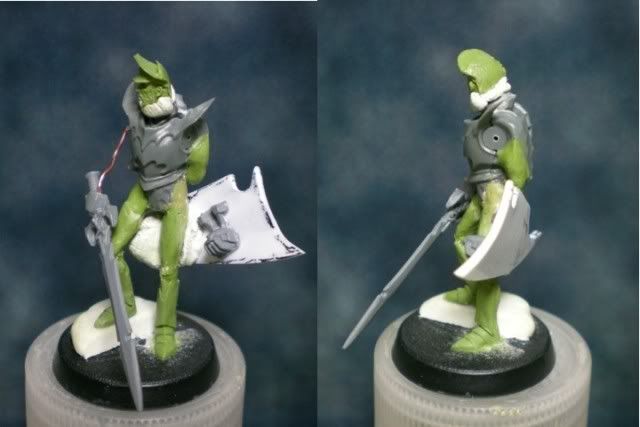
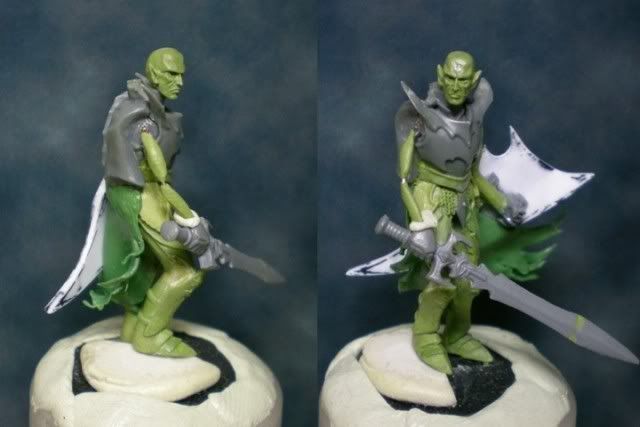
As a starting point, I took a torso. I made the legs with a pair of wires coming out of it, position them and then made a first sculpture of the legs with putty (in this case, Green Stuff and Milliput mixed in equal parts, which is what I used in almost all the figure) . With wire I also made a sketch of the arms, putting the sword and shield hands at the end of these wires. The sword was taken out a box of dark elves on cold ones, while the shield was done out of plasticard. GW shields seemed too small for what I wanted to achieve. As a basis for the head, I used one from Cadian upgrades, from Forgeworld. I made a mould and pulled out a copy in putty to work easily. These first pictures show the situation in the beginning:
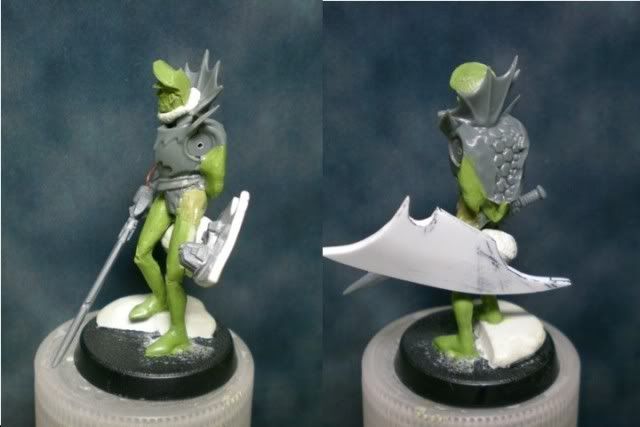
With the pose more or less clear, I started sculpting the legs. Also, I removed the collar from the corsair torso. These are the first armour plates for the legs:
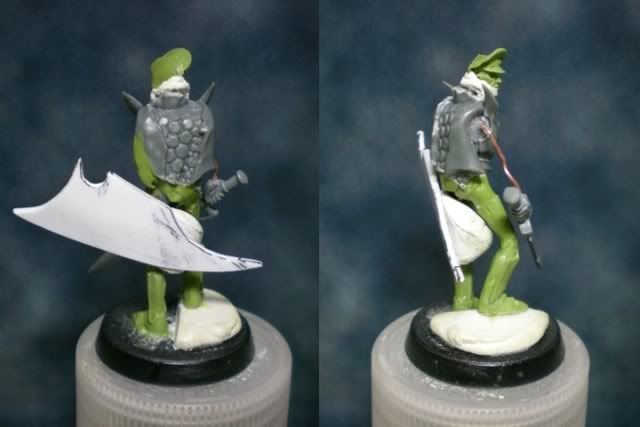
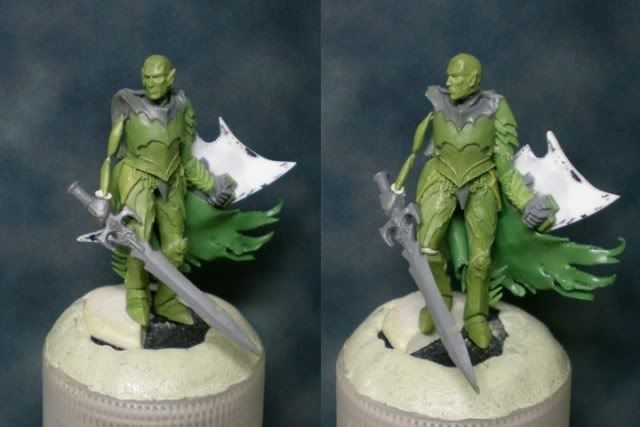
The FW head wore a cap so I had it removed and then modelled the whole skull, forehead and eyes. I also finished modelling the legs from knee to feet, and sculpted a pair of sculls for the knee plates.
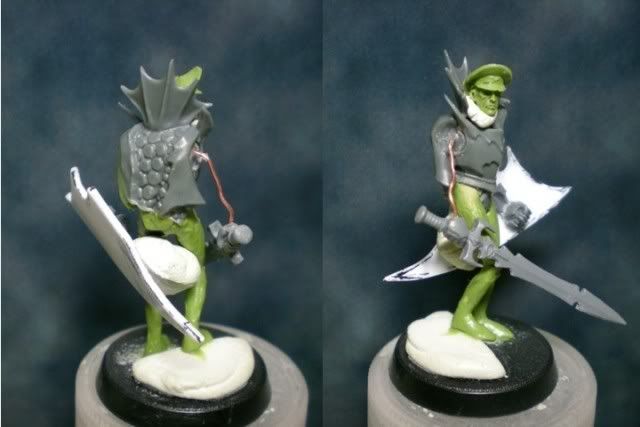
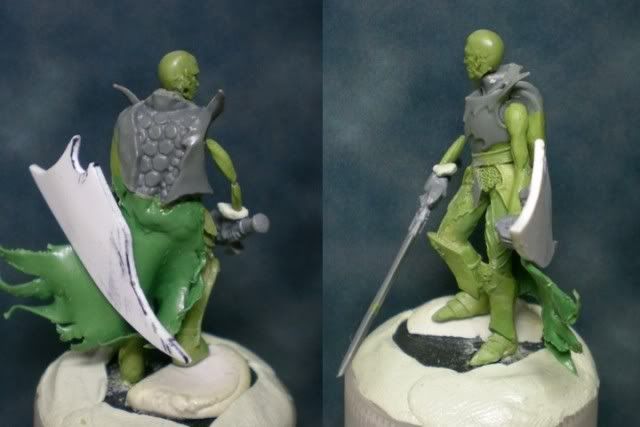
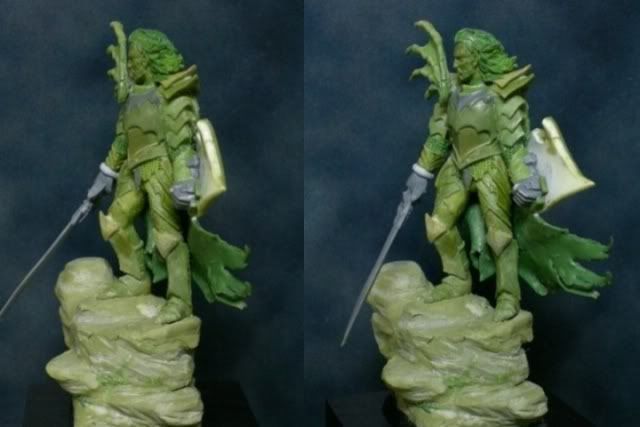
Now I finished the legs entirely, and also modelled the cape, which is the most important part of the figure in my opinion. I used green stuff only for this. I kneaded a thin layer of green stuff which I cut to the appropriate size and then sticked it to the back of Malus just by doing some pressure on the putty in contact with the figure. With some tweezers, I pulled the edge of the cape so that it ripped it and produced that torn effect on the ends. Green stuff behaves like cheddar cheese, only pretty much harder. The tricky part was to introduce the shield at the same time, while the green stuff was still fresh. It turned out to be quite difficult.

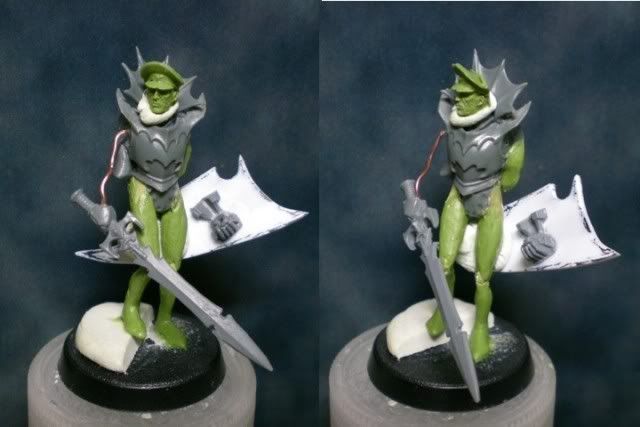
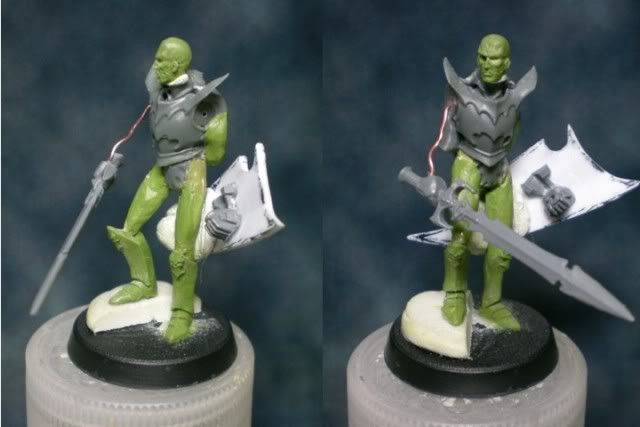
With that finished, I started to see that the torso seemed very small for the legs, especially in the side views. That’s why I decided to add some putty to the torso. In these photos I also started to model the arms, but the first armour plates I modelled turned out wrong so I did them again later.
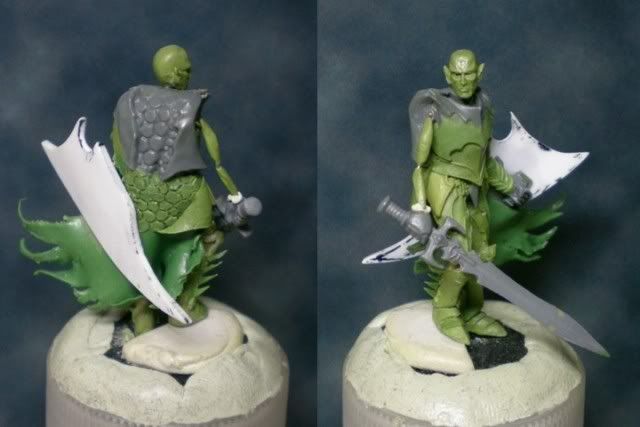
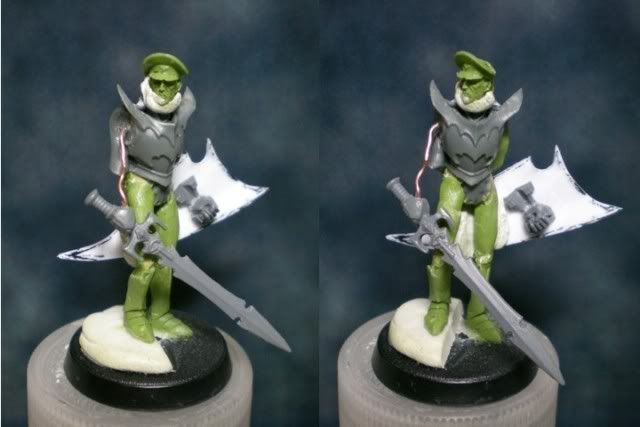
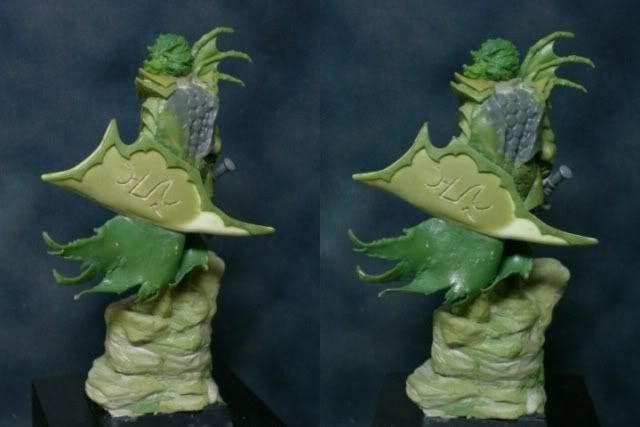
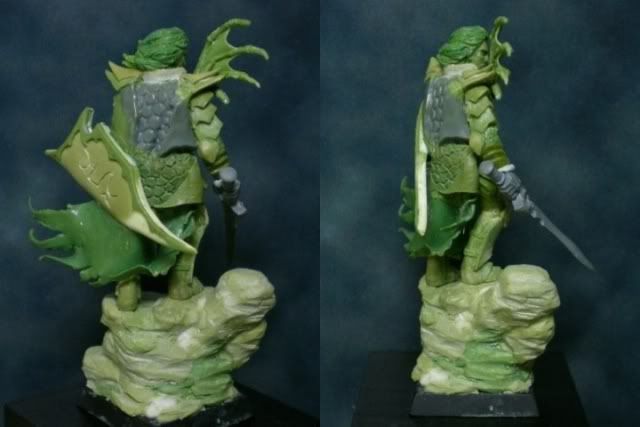
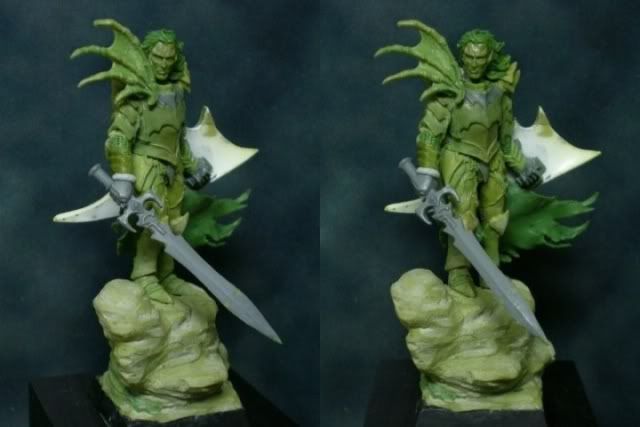
And these are the final photos. I finished the arms with some different armour plates, sculpted the “wingy” thing on the shoulder, and finished the figure with some long hair made with putty. Also, I modified the knees because I wasn't convinced with the skulls. I did some spikey armoured knee plates.
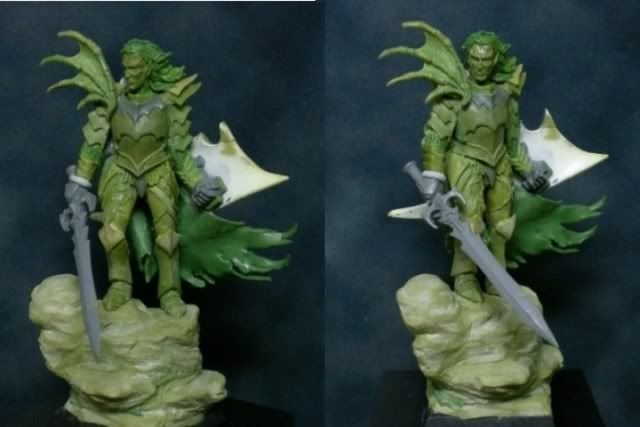
The base was very simple. It’s just a big piece of Milliput as a big rock, which I carved gently with a knife.
2 comments:
Awesome step-by-steps Volomir - it's great to see the WIP pictures of Malus and the detail that goes into the finished figure!
Oh, happy birthday for the blog too!
Just wanted to thank you for posting this - always great to see talented artists post stage by stage pics and description of what went into creating a fantastic figure such as this.
Big fan of your blog and I look forward to your renewed activity - shame your not attending GD UK, would be great to see your work up close IRL!
Post a Comment